Screen Printing Workshop 1
- Oct 11, 2019
- 4 min read
Updated: Nov 11, 2019
Before I started the workshop I did some research on what colours I would like to use. I took some colours from my own photos that I had taken a couple weeks earlier such as:


I also looked at what other artist had done with colours. I researched Kate Gibb who is a silk screen print designer and uses many different colours and textures to create designs. She has worked with Apple, Pentagon and Nike to say a few.

I also researched Dieter Roth a Swiss artist who from 1947 to 1988 did over 528 prints. In this photo I particularly like the layering of the blue and red creating an entirely different colour.

On the day of the workshop we learnt with our Tutor Caroline how to create a screen from our halftone designs that previously we had created the week before on InDesign.
The step by step process:
1. Print out the image onto tracing paper at the your preferred size.
2. Pick your screen and degrease it with the 'degreaser' chemical and rinse well then leave to dry.
3. Put the photo emulsion onto the screen by pouring into a metal trough with the plastic ends firmly attached and then slowly move the trough up the screen coating it with a even layer of emulsion, leave to dry.
4. To put the image onto the screen you have to use a UV machine. SO first lay the image on the machine make sure the glass is clean.
5. Once the image and the screen is aligned close the lid. Turn the red switch on and press the vacuum button on (looks like a speaker symbol) this will suck all they air so screen and the tracing paper are close together.
6. Set the counter units to 90 and press the green button, this turns on the UV light. It will take time to warm up if first used but the numbers on the counter will fall very quickly once machine has warmed up. Once at zero turn everything off and take out your screen and tracing paper.
7. Immediately after take your screen to the wash area and wash off the unexposed emulsion with a gentle hose your image should slowly appear. Once done put in a hot cupboard to dry.
(all these steps bar step one should be done under non UV sensitive light)
Once the screen were made we learnt how to create the actual print:
The step by step process:
1. Place screen onto print bed and tighten into place.
2. Place desired paper under the screen and turn on the vacuum in order for the screen to stay in one place.
3. Get your desired ink and place allot of ink above the image on the screen using a pallet knife.
4. Get a squidgee the correct width of the image on the screen and flood the screen, by lifting up the screen and pulling through at a 45 degree angle.
5. Place the screen down and pull through the ink again.
6. Lift up the screen move the paper onto the drying rack and admire your work!


In this workshop I did have a few failures especially this red print (above) because I didn't properly flood the screen (left) mean barley any of the ink came through.

However I did have a successful print from many other workshops and research I knew that 'Less is More' so I started off by just trying to use two screens and that's it. To create interest I followed the brief and tried to create contrast how I did this was by using a light coloured organic shape behind a darker more geometric shape. This worked out very well and I was happy with this. However I did feel through out this session I played it too safe so to set me up for the next session I came in again and experimented more.
When I came back in for further development I added more stuff onto screens. I first divided up my half tone pattern so in the next work shop I can use different colours. I also experimented with adding a photo so still thinking about creating contrast I took a photo from my own portfolio and put it onto a screen. I tried to print both the half tone worked well however the flower not so much it didn't create a strong definition of the flower.

But I did really like the black and white print onto tracing paper so while I was trying to arrange the design onto a print I decided to just stick the actual tracing paper down and next week I will experiment by printing on top of it.

I also created backgrounds so when I go into next week workshop I can start printing straight away. Some of the backgrounds I experimented with was spray paint and layering, next week, I plan to start cutting up my prints and what I can do with collage.
Research
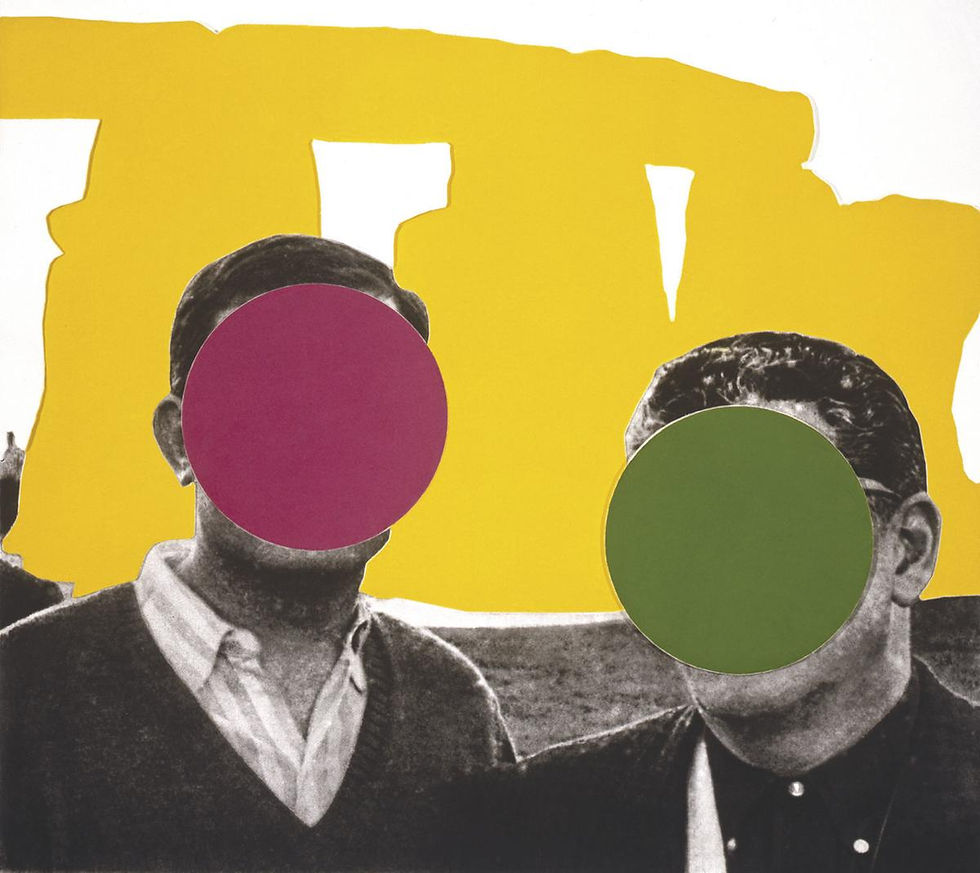
For preparation for next week I have researched the artist John Baldessari because he famously put dots over images and I am planning next week to do that in my own way with my flowers and any other images I collect so it is interesting to see how he composes his work altogether.


Comments