Dark Room
- Nov 15, 2019
- 3 min read
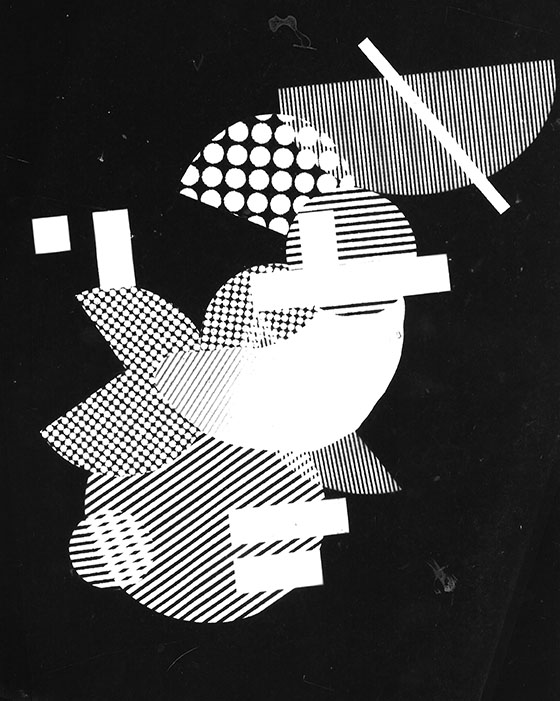
In this Workshop we learnt how to create a Photogram which is a 'cameraless' process. This technique produces a shadowy negative image that is obtained by placing objects directly on photographic paper or other light-sensitized surfaces in the darkroom and then exposing it to light, in this case, using an enlarger.
We used the halftone shapes we created for screen printing and exposed them to light.
To start off with the process we had to set up the enlarger.
1.
Turn on the light on the enlarger. Move the head so the box of light is large enough to cover the area of the photo paper and some more.
2.
Move the aperture four f/stops to make the light box in focus. Turn off the light
3.
Place a test strip under the glass plating and use a piece of cardboard to cover most of the strip, only leaving a small bit exposed. Turn the light timer to 1 second and turn the light on. Move the cardboard a little bit more and repeat. Do this until there is no paper left (make sure you remember how many time you do this so you know how exposed each section is).
Then to develop the image you have to move the paper to the baths in the dark room.
1.
Put the paper in for 1 minute in the developer bath. Make sure you agitate the water (rocking the tray gently back and forth).
2.
Move the paper to the stopper tray (using tongs). Keep it in for 30 seconds.
3.
Then move the paper to the fixer tray and leave it in for a minute.
4.
Move the paper to the running water tray and leave it in for 5 minutes to make sure the excess chemicals have gone.
5.
Let the paper dry.
Looking at the test strip you will be able to see the blackest area this will help to indicate how long your photogram should be exposed. Moving onto your proper photograms change the timer to the best time of exposure.

In the brief for this workshop we were tasked to make five photograms which were either structured, chaotic or movement.
Structured

Chaotic

Movement

For movement I used a technique which is similar to the first process of finding out the best exposure. It just this time you expose the desired layout for the right amount of time as you would for the other prints and then move your objects and expose again. Creating this movement effect I liked this because it created interesting layering and tonal effects.
Making a positive into a Negative


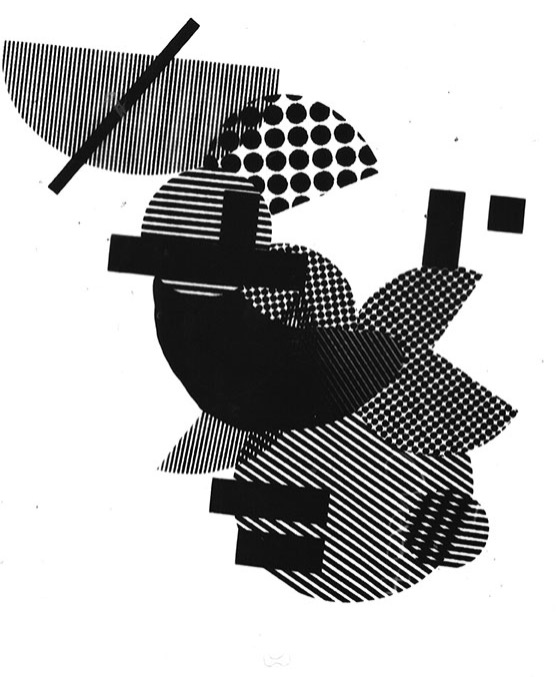
To make a negative into a positive you have to first make the negative image and then once it is completely dry you can use for this process. Place the blank photo paper down with the shiny side up and then place the negative shiny side down on top. Place the glass on top to make sure the two papers are close together or 'kissing'. Expose at the normal exposure and go through the normal developing process and a positive should come out at the other end. (Negative left, positive right)
Research
To further my knowledge after this class I researched some designers to see how this technique is put into a real life scenario.
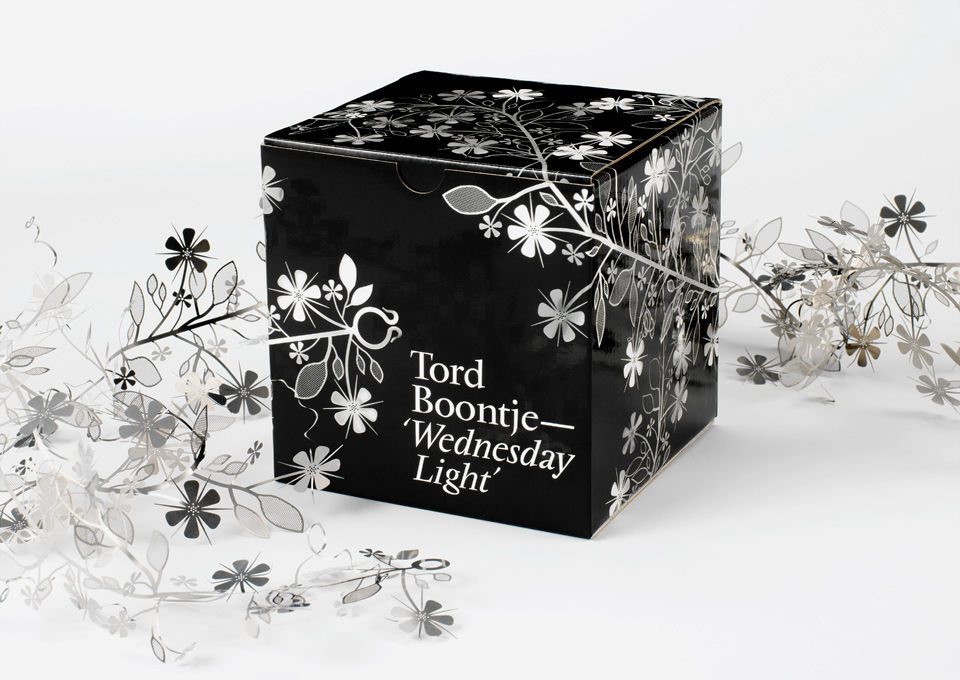
I looked at the designer Tord Boontje who used the photogram technique on packaging of a metal floral garland, this made it easily show what the garland looked like to the buyer because it would be difficult to show as clearly with any other graphic techniques. This was very interesting to see how they used this technique in a more commercial way.


I also looked at the photographer Curtis Moffat from 1923 collaborated with the artist Man Ray to create photograms they both used this technique to create abstract compositions with the ordinary items.


Comments