Book Binding
- Oct 8, 2020
- 3 min read
Updated: Oct 29, 2020
In this lecture we learnt about more advance techniques in book binding. we created a multi section exposed sewn binding.
Inside Pages - Method
Step 1

Fold 5 sections of 5 plain white pieces of paper and 2 sections of 4 plain white paper and 1 heavier piece of grey paper. Making sure to fold with the grain and using bone folder.
Step 2

Create a guide for where to puncture the sewing holes. Using a strip of paper the same length as the folded pieces.
Step 3

Puncture the holes from the centre page to the outer page using a pricker. Making sure to puncture the holes along the crease. Holding in place the guide with your other hand.
Step 4

Line all the sections up so the holes are parallel. If that is not the case like in the picture opposite turn over the sections, which should make it more level. You should make sure that the two grey section are on the outside of the pile.
Step 5

Face holes in pile of sections away from you and turn the first section over. Do a simple zig zag stitch from right to left starting from the outside in. Making sure to leave about 6cm of free.
Step 6

Place the second section on top and pul the thread tight. Do a simple zig zag stitch until the second hole where you need to put your needle down through the stitch bellow on the other section to join the sections together.
Step 7

When you place your third section on top do the same stitching as the section below and make sure you only thread through the second section (or middle section) not the first (or bottom section).
Step 8
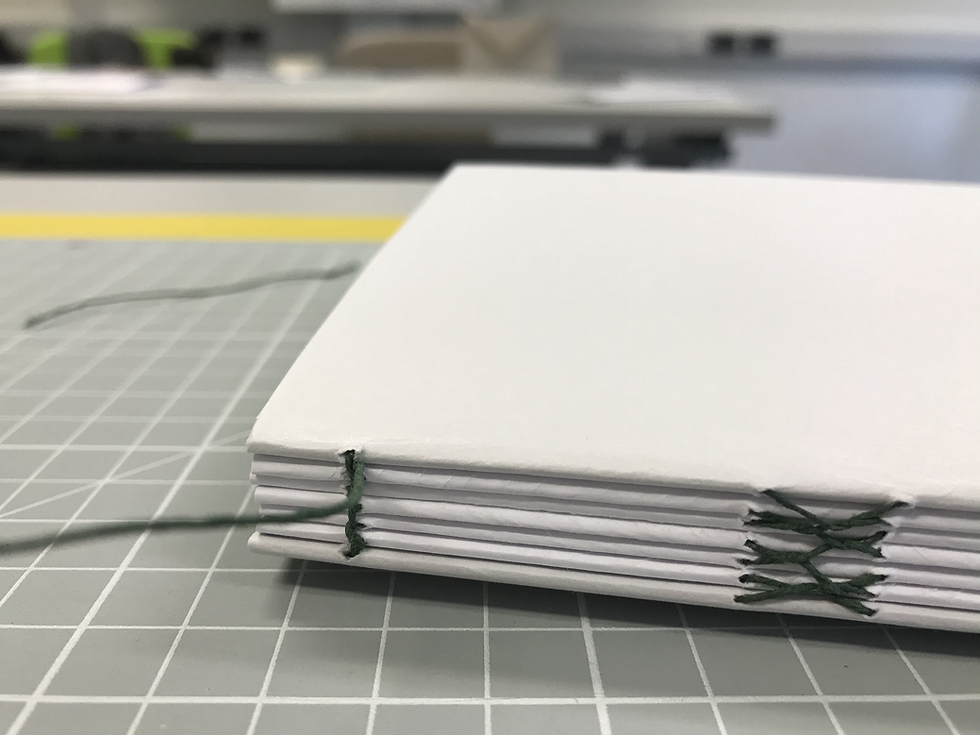
When you are stitching your sections you need to do a loop around the end holes. Thus making it more secure.

To continue we created the book cover for this book. To create the cover you need to bits of card board cut to size, two pieces of fabric to cover the board, and PVA glue to stick everything together.
Book Cover - Method
Step 1

Place the board on top of the fabric and cut a 15mm border around the board.
Step 2
Using PVA glue brush it onto the fabric in upward strokes making sure you do not have an excess amount of glue on your brush.
Step 3
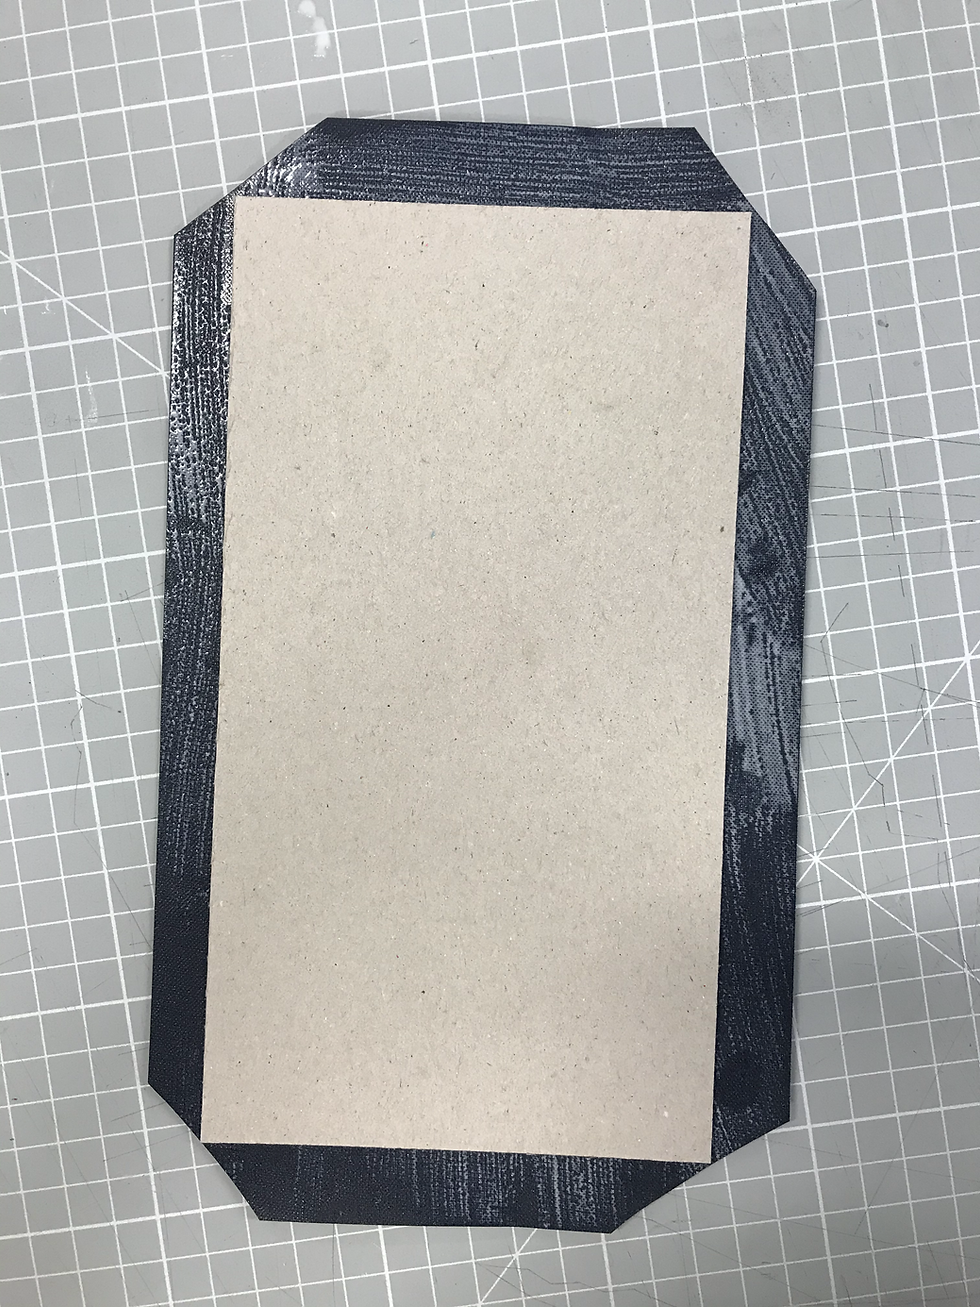
Place the board in the centre and press to stick down. Then cut off the corners leaving a 3mm gap.
Step 4
Fold the fabric edges top and tail first then the sides secondly. Place in a press between two pieces of newsprint for at least an hour to let the glue dry. Do step 1 to 4 twice for the back cover and the front cover.
Step 5

Once the cover have dry you should glue the front and back page of the book and place the cover carefully on
top place in press for at least 24 hrs to let it dry.


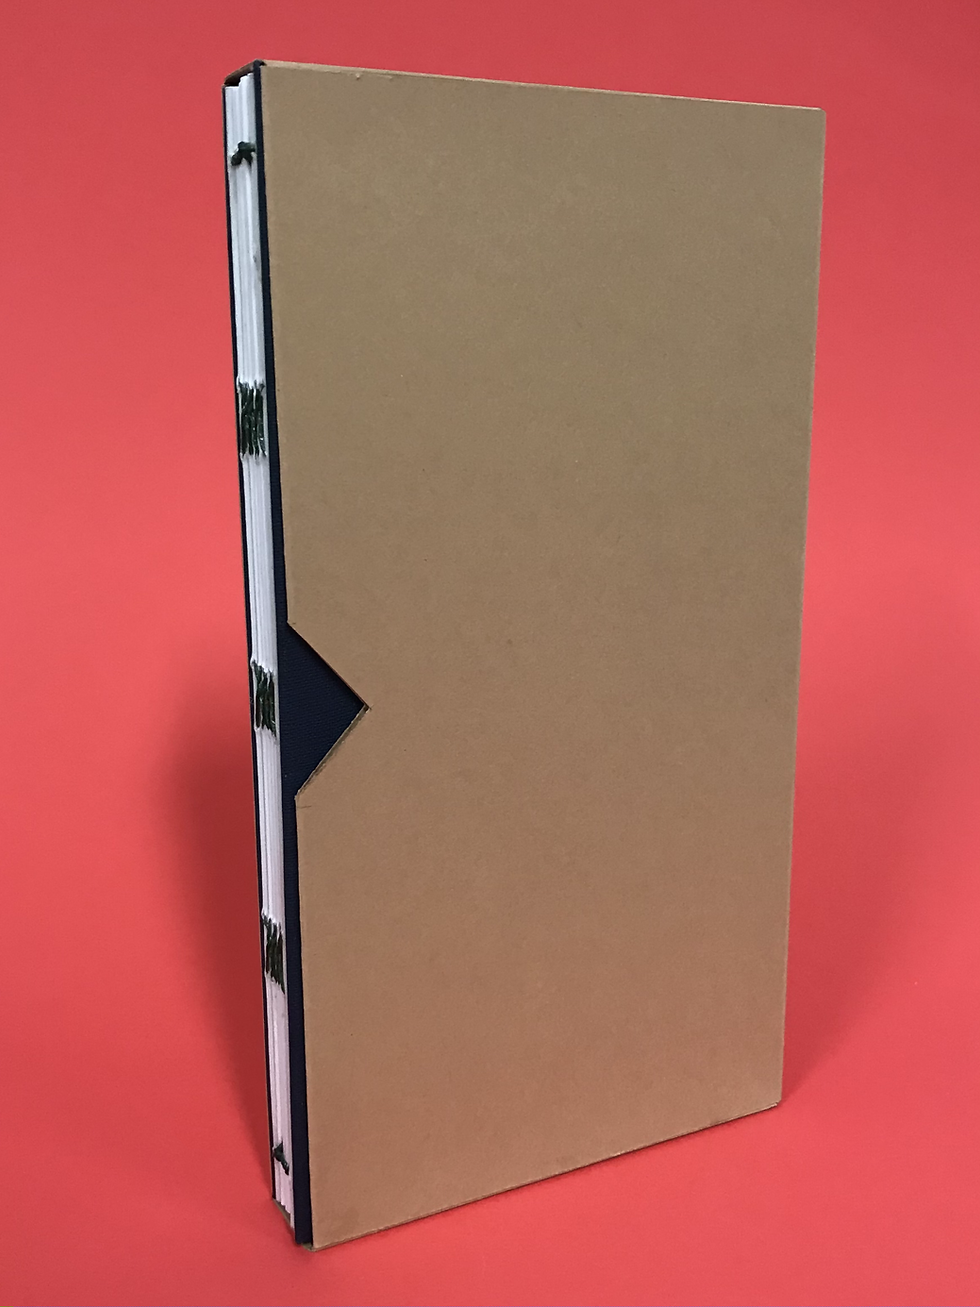
To continue we went on and created a slip case for the book. This will safely hold the book and make sure it survives any wear and tear.
Slip Case - Method
Step 1

Measure out the width, height and depth of the book that you have created. Make sure you are millimetre accurate otherwise the case maybe too big or too small.
Step 2
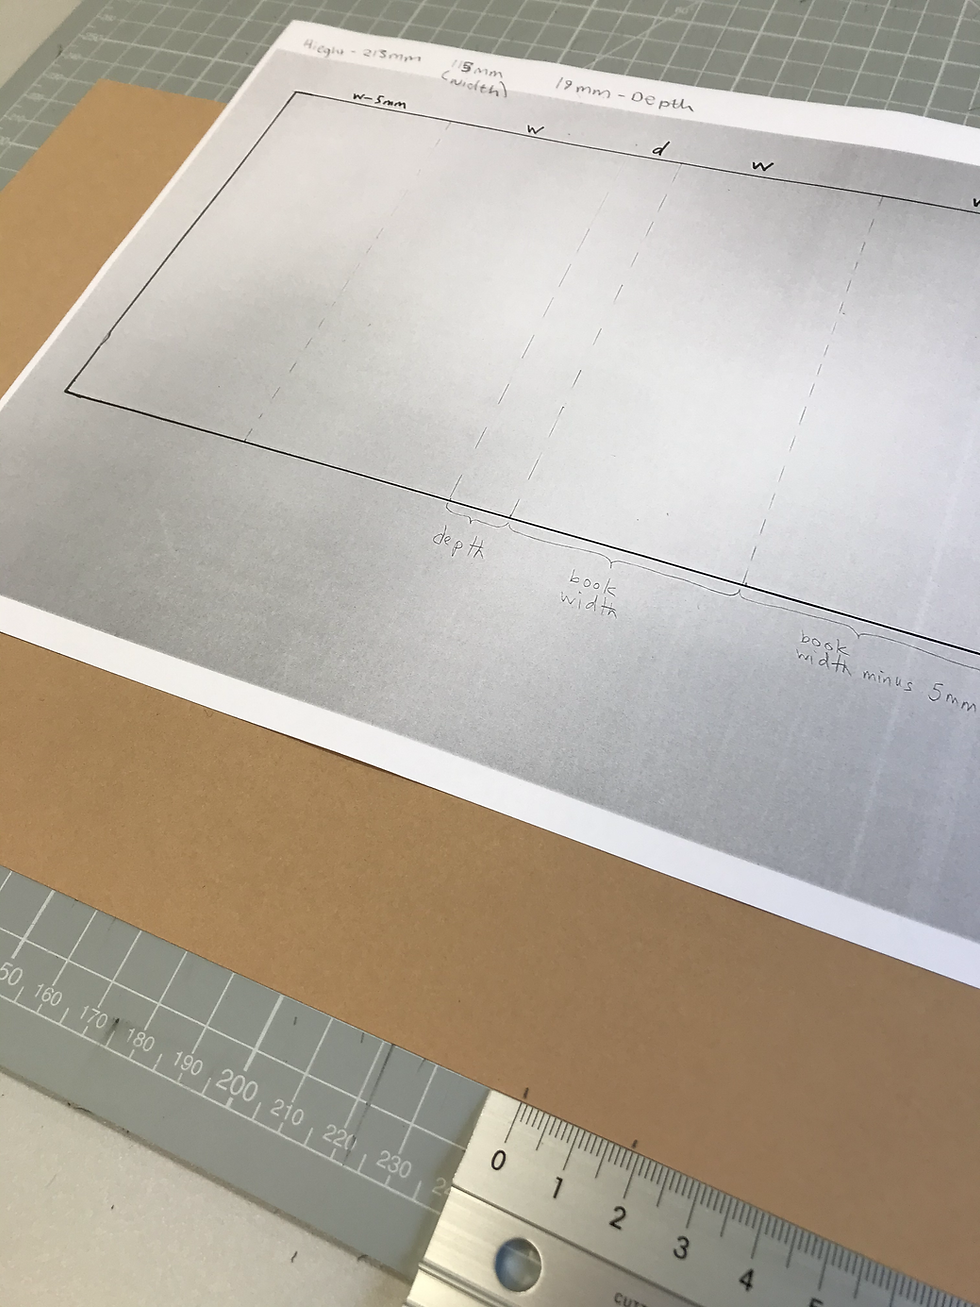
Cut your chosen card to size and using a guide mark out where the folds need to go. The guide should go like this:
Width - 5mm, Width, Depth, Width, Width - 5mm
Step 3

Using a bone folder score where the marks have been place and then fold you should create something similar to the image opposite.
Step 4

To create the top and bottom section of the slip case mark out the measurements:
Right Flap 15mm, Depth, Left Flap, Top Flap.
Step 5

Cut the top and bottom sections to size. Making sure each flap is cut slightly diagonal. Once you have done fold it into shape like step 3.
Step 6

Using PVA glue, glue the inside and the outside of the flap and slot it in to to the case. Use a bone folder to stick everything together.

Over View
These methods will be useful knowledge for when I have to print out my process book at the end of the semester.


Comments