Project 3 - Digital
- Nov 22, 2020
- 4 min read
For my design I decided to create a short instagram video detailing the places and dates of the exhibitions. I created this video on Adobe After Effects this is a brand new software that I have never used before. It is used to create small videos and animations. I learnt about this in a lecture creating the example I displayed in this post.
Method
Preparation
1.
Open the file Start.ai with Adobe Illustrator. The file is set on a canvas 1080x1080 (a recommended size used for social media)
2.
To be able to work with After Effect with this file we will need first to separate all the elements in different layers.
3.
Note all the elements for the animation are already grouped in the file.
4.
For each element create a new layer using the layer box window > Create the file

5.
Once you have created all the layers save the file.
Making the Animation
1.
Open Adobe After Effect.
2.
Create a new project
3.
Import our layers File > Import > File...

4.
Note when importing the file select Composition - Retain Layers Sizes from the drop-down menu Import As
5.
In the Project Window, I can see my imported composition file (Layers.ai). The Adobe Illustrator file is transformed in an After Effect composition and all the layers are kept separate.

6.
I can start working on the composition by double-clicking on its name on the project window, and I will see all the layers in the timeline window.

7.
As you can see the default background in After Effect is black. To change the background draw a white square using the Rectangle Tool in the top Toolbar. Once the tool is selected choose the colour with the Shape Fill Colour Window. A new layer will be automatically created in your timeline. (Once created move to the bottom of your timeline)

8.
Right-click on the composition (Layers) in the Project Window then select Composition Settings
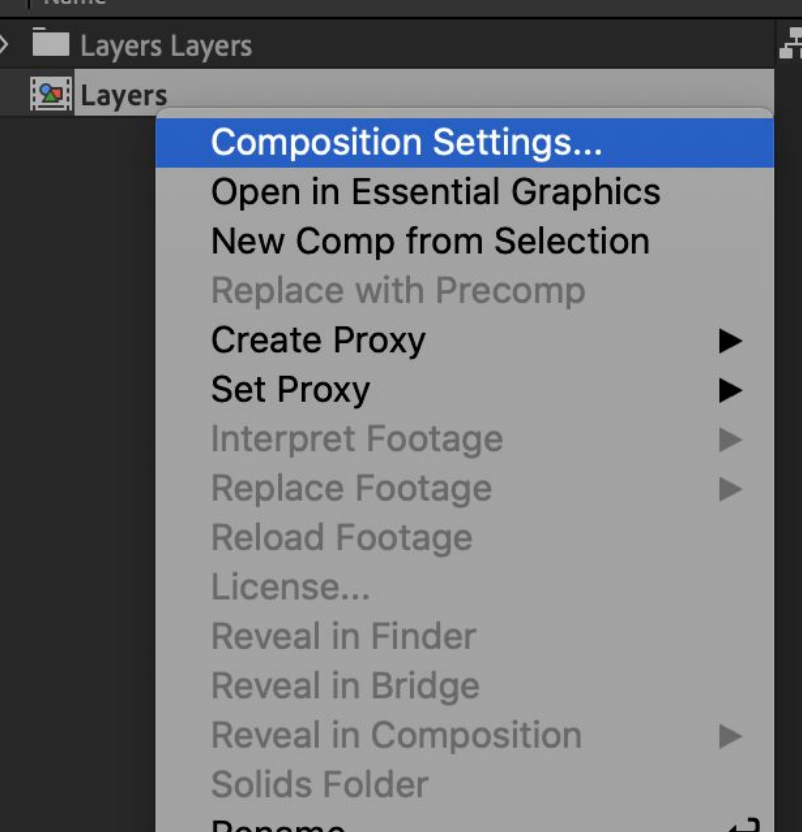
9.
In the Composition Setting Window:
Set the Frame Rate at 25
Set the Duration to 20 second

10.
Now we need to adjust the starting time of the layers that are not needed at the beginning of the animation.
11.
In the timeline place the cursor at 3 seconds and move the beginning of my logo and photo layers at 3 seconds.

12.
To begin to animate of the two triangles layers you will need to set the initial and the final position of the motions, creating keyframes. Move the cursor to 0 sec then click on the Triangle up layer, then select the drop-down menu > Transform > click inside the stopwatch of Position (to do that you can also use the shortcut P to visualize just the Position in the dropdown menu).

13.
Then add the keyframe when the motion of the triangle will stop at 1,5 sec. Move the cursor to 1,5 sec and then add a keyframe selecting Add Keyframe tool in the Position row

14.
Now we need to set the motion of the Triangle up layer: Move the cursor to the start of the timeline. Then move the graphic of the Triangle Up layer outside the artboard at the top, holding SHIFT so the graphic moves perpendicularly.
15.
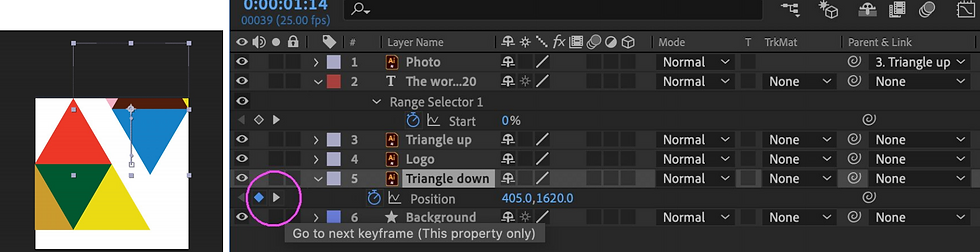
Repeat the same step for the Triangle down layer adding a keyframe at 1.5 and 3 sec. Then setting the motion of Triangle down layer from 1,5 and 3 sec. Move the cursor to 1,5 sec and move the graphic of the Triangle Down layer outside the artboard at the bottom, holding SHIFT so the graphic moves perpendicularly.
16.
Now we create the Opacity transition for the layer Photo. Click on the Photo layer, select the dropdown menu > Opacity (T is the shortcut for Opacity). Add a keyframe to 3 and 4 sec. At the 3 sec keyframe, we set the opacity at 0%.
17.
To create the logo motion repeat the same step we did for the triangles: create the keyframes in the needed positions (4 and 7 sec) of the timeline, then position the cursor on the first keyframe (4 sec) then move the logo graphics outside the artboard.

18.
To make the blue triangle as my background I need to scale the graphic of the Triangle up layer. Move the cursor to 8 sec in the timeline, click Scale and add a keyframe. Then Click Position and add another keyframe.
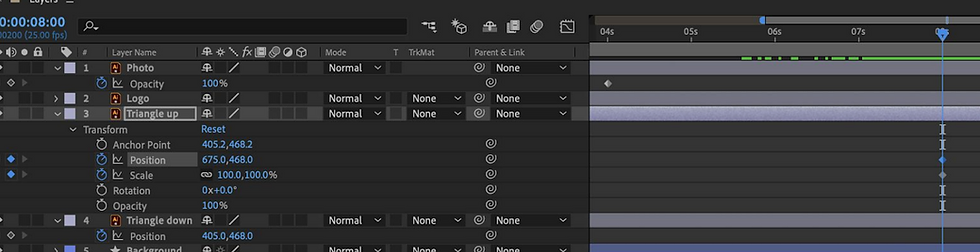
19.
Move the Triangle up layer just under the Photo layer (which needs to be the top layer for our animation)
20.
Position the cursor at 10 sec in the timeline.
21.
Select the Triangle up layer in the artboard and scale and move it until it covers the artboard background.
22.
Now we need to link the scale animation of the Triangle up layer with the Photo layer. Move the cursor to the beginning of the triangle transformation (8sec). Click on the Photo layer, then select Triangle Top layer from the Parent & Link drop-down menu.

Exporting to Media Encoder
1.
Now that the Animation is finished we can export it creating an mp4 video file
2.
Select File > Export > Add to Adobe Media Encoder Queue
3.
Once Media Encoder is Open to see the location of the file click on the link in the Output File

4.
In the folder when I’m saving the AE file, a new folder is going to be automatically generated, with Name file_AME name
5.
To set the output setting open the link in Preset

6.
The Frame rate should be set at 25. Make sure the Export Audio is un-ticked, and select Match Source to keep the same size of the artboard file.

7.
Then start to render the animation clicking on Start Queue button at the top. The green tick indicates the render is ready

Designing
I based my design of the post of my poster. I made a few variations of my instagram tile because I did this simultaneously with creating my poster so as my poster design developed so did my animation.
Initial Idea:
Development:
In this animation I removed the box around the logo and I also shortened it a bit because the previous one took a long time.
Final Design:
For my final design I decided to make it look more like an artwork at the the end by removing all the type around the design at the end.
Mock up of what it would look like on instagram:

As explained in my previous post I also created a dynamic logo which I would put up on instagram and other social media .


Comments